Desktop Quickstart
Install and set up the Sales OS desktop app — accept your invitation, download the app, grant permissions, select your playbook, and join your first AI-assisted call.
Desktop Quickstart
The Sales OS desktop app is your real-time coaching companion during sales calls. It runs on your machine, listens to the conversation through your microphone and screen audio, and provides live AI guidance based on your active playbook.
This guide takes you from your invitation email all the way to joining your first AI-assisted meeting.
Step 1: Accept Your Invitation
Your manager will send you an invitation to join the Sales OS organization. Check your email for a message from Sales OS.
Click the Accept Invitation link in the email. You will be redirected to the Sales OS login page.
Step 2: Authenticate on the Login Page
The login page confirms your authentication and shows your account details.
-
Verify your identity — the page shows your name and email address once you are signed in. If you are not signed in, click Sign In to complete authentication.
-
Select your organization — use the organization selector to choose the correct organization. A green confirmation badge appears once an organization is selected.
Step 3: Download the Desktop App
Once authenticated and your organization is selected, you will see download buttons for both platforms:
- macOS — downloads a
.dmginstaller - Windows — downloads an
.exeinstaller
Click the button for your operating system. The download starts automatically.
Step 4: Install the App
macOS:
- Open the downloaded
.dmgfile - Drag the Sales OS app icon into your Applications folder
- Open the app from Applications (you may need to right-click → Open the first time due to macOS security settings)
Windows:
- Run the downloaded
.exeinstaller - Follow the installation wizard
- Launch Sales OS from the Start Menu or Desktop shortcut
Step 5: Sign In to the Desktop App
When the app opens, it checks your authentication status.
If you are not yet signed in, the app shows a Login button. Click it — a browser window opens for you to complete authentication with your organization credentials. Once authenticated, the browser closes and the app signs you in automatically.
If you were already authenticated (e.g., the app remembered a previous session), you are taken directly to the main window.
Step 6: Grant Required Permissions
Sales OS requires two system permissions to function. On first launch, a Permissions section appears with two cards:
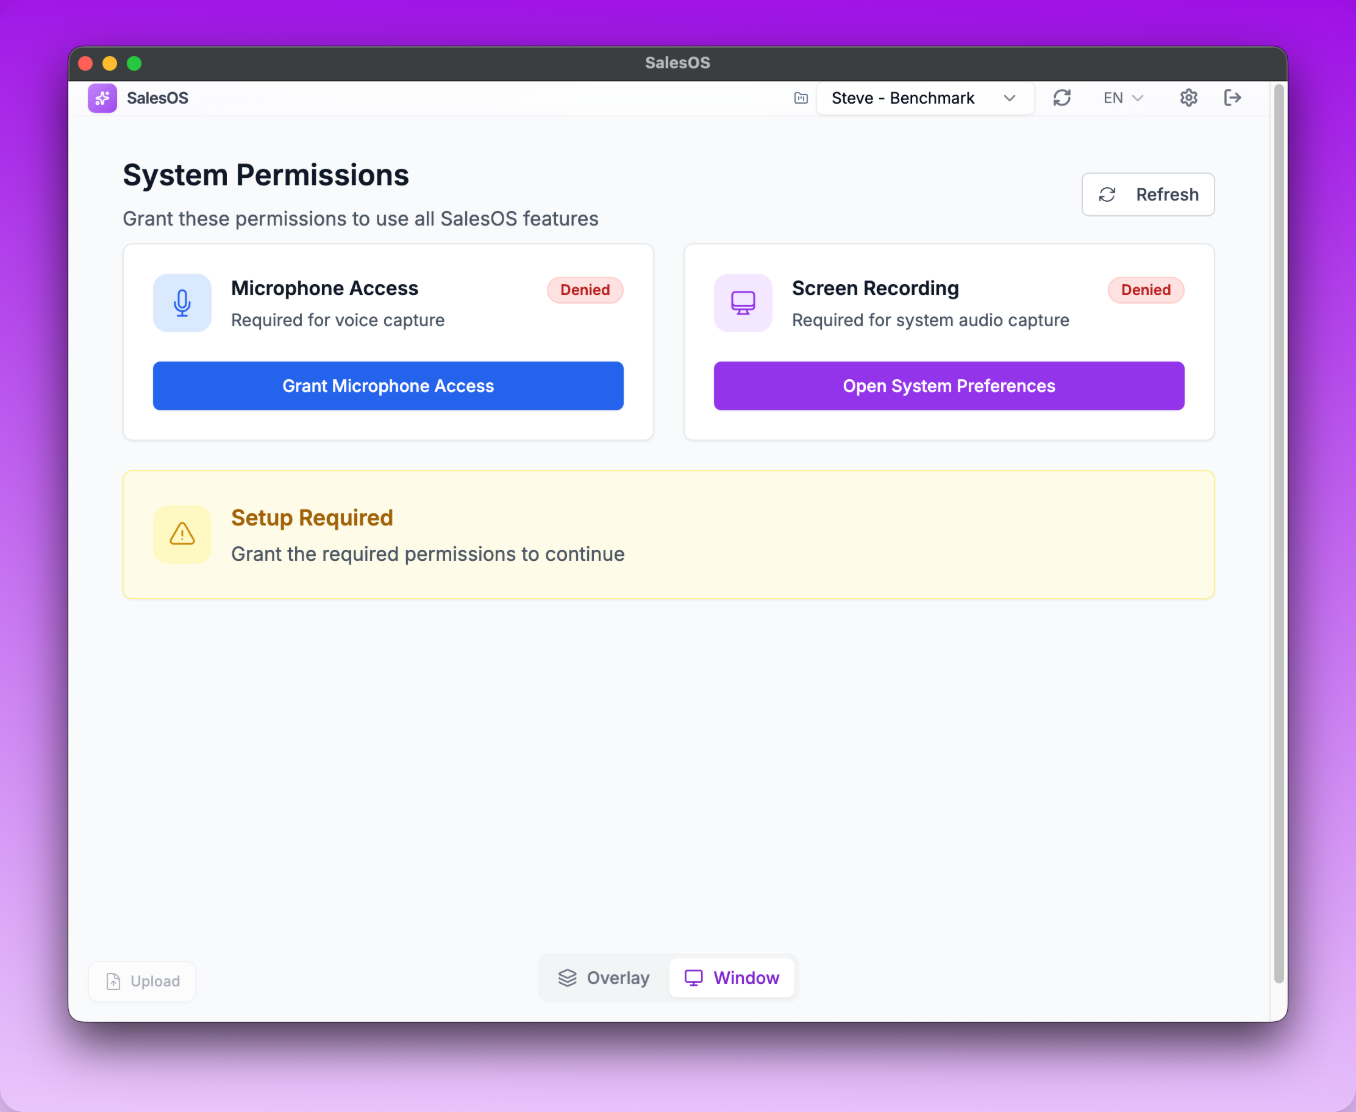
The Permissions screen — both cards must show a green status before you can proceed.
Microphone Permission
Sales OS needs microphone access to capture your side of the conversation. Click Request Microphone Access and approve the system prompt that appears.
Screen Recording Permission
Sales OS needs screen recording permission to capture audio from other participants in the call (e.g., through a screen share). Click Open System Preferences and enable screen recording for Sales OS in your macOS or Windows settings.
After granting both permissions, click Refresh to confirm the status. The permissions section disappears once both are granted.
You only need to grant these permissions once. They persist across app restarts.
Step 7: Select Your Project and Playbook
After permissions are granted, the main window shows the Start Assisting section.
-
Project selector (in the top header) — select the Sales OS project your manager has set up. Your manager creates projects and assigns them to the team. If no project is visible, contact your manager.
-
Playbook selector (in the Start Assisting section) — select the playbook you want to use for this call. A playbook defines the questions the AI monitors, the FAQs it can answer, and the coaching instructions it follows. Your manager creates playbooks — select the one relevant to your current deal stage.
The app remembers your last-used project and playbook and pre-selects them on next launch.
Step 8: (Optional) Link a Deal or Company
If your organization uses a CRM integration, a Deal or Company selector appears below the playbook selector. Linking a deal or company associates the call data with the correct CRM record, enabling automatic field extraction after the call.
This step is optional — you can start assisting without a linked deal.
Step 9: View the Content Tabs
The main window has tabs below the Start Assisting section:
- Upcoming Calls — calendar events with meeting links, sourced from your connected calendar
- Previous Calls — a log of your past Sales OS calls with basic metadata
- Battle Cards — competitive intelligence cards prepared by your manager for the selected project
- Prep Sessions — pre-call preparation sessions you have completed
Review your upcoming meetings and battle cards before the call to be prepared.
Step 10: Start Assisting

The Start Assisting screen — select your playbook and click Start Assisting to begin a session.
When you are ready to join a call:
- Confirm the correct playbook is selected
- Click Start Assisting
The app begins capturing audio. In Standard mode, the assistant view opens in the same window — you will see a live display of AI coaching insights as the conversation proceeds. In Overlay mode, a separate floating window appears so you can keep your notes or CRM open in the background.
You Are In Your First Meeting
The Sales OS desktop app is now active and coaching you in real time. The AI listens to the conversation and surfaces relevant playbook steps, prospect questions, objections, and suggested talking points as they emerge.
Next steps:
- Adding Sales Reps — if you are a manager, learn how to invite your team
- Create Your First Playbook — build a playbook so your reps have coaching guidance
- Calls & Analysis — review what happened after the call ends